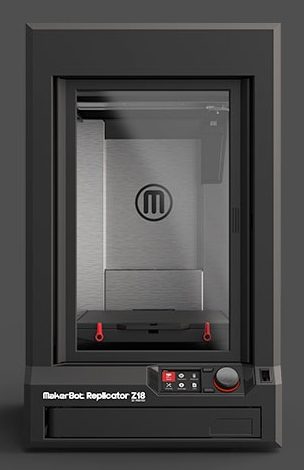
MakerBot Z18
This is XP’s largest 3D printer with a build volume of full 42 liters. This uses BuildTak’s flexplate system, which means that sharp-edged spatulas are not allowed. To remove the print from the building plate, the entire construction surface that is stuck with magnets is removed from the printer, and then gently bend this part slightly.

| Print volume (W x D x H) | 304mm x 304mm x 457 mm |
|---|---|
| Filament diameter | 1.75 mm |
| Nozzle diameter | 0.4 mm |
| Permitted materials | Pla |
| Max. Temp. Nozzle | 240 °c |
| Max. Temp. House | 50 °c |
| Inventory resolution | 100-340 Micron |
Problem solving
Below you will find a quick guide to common problems that may arise as well as instructions on how these are most appropriately addressed. If any problem falls outside of this cheat sheet then the XP handlebar should be contacted.
| Filament does not load | Run “unload” and then “load” again. It is easier for the extruder head to get the filaments correctly if you install the white plastic hose that goes down the head and feeds the head directly |
| Filament does not load | Run “load” and let the filaments extruded for ten seconds, then start “Unload” again. |
| Filament is not extruded during print | This is a sign that something is blocking the nozzle. Contact the XP handlebar. |
| Printing does not detach from the build plate | Take out the entire building surface that is stuck with magnets, gently bend the surface so that you hear your print |
| Object detached during printing | This may be due to dirty surfaces. Clean the substrate with acetone/ethanol. If the problems persist, please contact the XP handlebar. |
| Print paused unexpectedly | Make sure the door of the printer is closed. If this opens during the transition, the print job pauses. |
| The extruder head comes off during printing | If you estimate that the printout has done well so far so you can mount the head again and continue printing, otherwise you get to start over with printing. |
| The extruder head is in place but the printer warns that it is not recognized | Assemble the magnetic printing head with hand force and put it in place again. Run the “Attach-script” found in Utilities > System Tools > Attach Smart Extruder |

